We know that leftovers decompose on their own and can be thrown into a waste bin. Then, nature comes and does the rest, right?
Wrong!
We produce nearly 2 billion tons of squishy waste, best known as organic waste, per year and half of it ends up in landfills. This material releases a large amount of methane gas, which has a global warming potential 25 times greater than that of carbon dioxide, according to the Intergovernmental Panel on Climate Change (IPCC). “In addition, the material mixes with other types of waste and generates organic slurry, which is toxic, as it contains substances such as heavy metals and medicines. It also contaminates the water table and hence the water we consume,” says geographer Leila Vendrametto, an environmental educator with Ecoativos, a group working to bring sustainable practices to Brazilian public school students.
Studies on waste production, including the World Bank report What a Waste: A Global Review of Solid Waste Management, show that each citizen can make a difference by making small changes in their lives. In the United States, the annual per capita waste production is about 734 kilograms (1,619 pounds) per year. On the other hand, in a European country, like France, that figure is closer to 509 kilograms (1,123 pounds).
In the USA, which has the highest rates of consumption and waste in the world, a single person who composts all the squishy waste they produce (fruit, vegetables, meat and other types of food) can prevent the accumulation of 367 kilograms (810 pounds) of organic waste in landfills per year. Considering that every kilogram of organic waste generates 400 grams of methane gas, that individual, then, is preventing the emission of 146 kilograms (322 pounds) of methane into the environment.
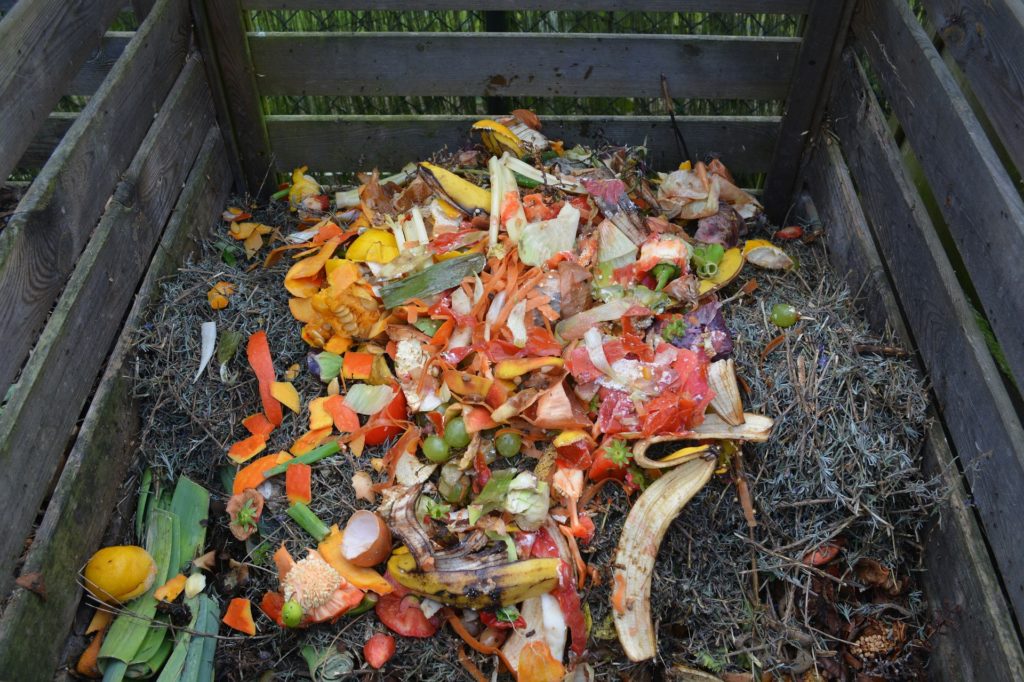
When building your compost, be aware of what does and does not belong in it, and follow some tips to avoid smells and excessive moisture (Picture: Pixabay)
GETTING STARTED
When building your worm compost, consider the number of people who share your home, as well as the number of daily meals and the types of food products your household regularly consumes. These tips will help you to anticipate the size of the compost (see the chart below), and create one that can be used even in an apartment. Then, get ready to start.
Pile three colored plastic boxes or buckets. If you choose buckets, make sure each has a cover, so that they do not slide inside each other. Take two covers and drill a large hole in the middle of each, with a margin limit of 10 centimeters. Leave the third cover without a hole, to cover the top bucket. Follow the recommendations below.
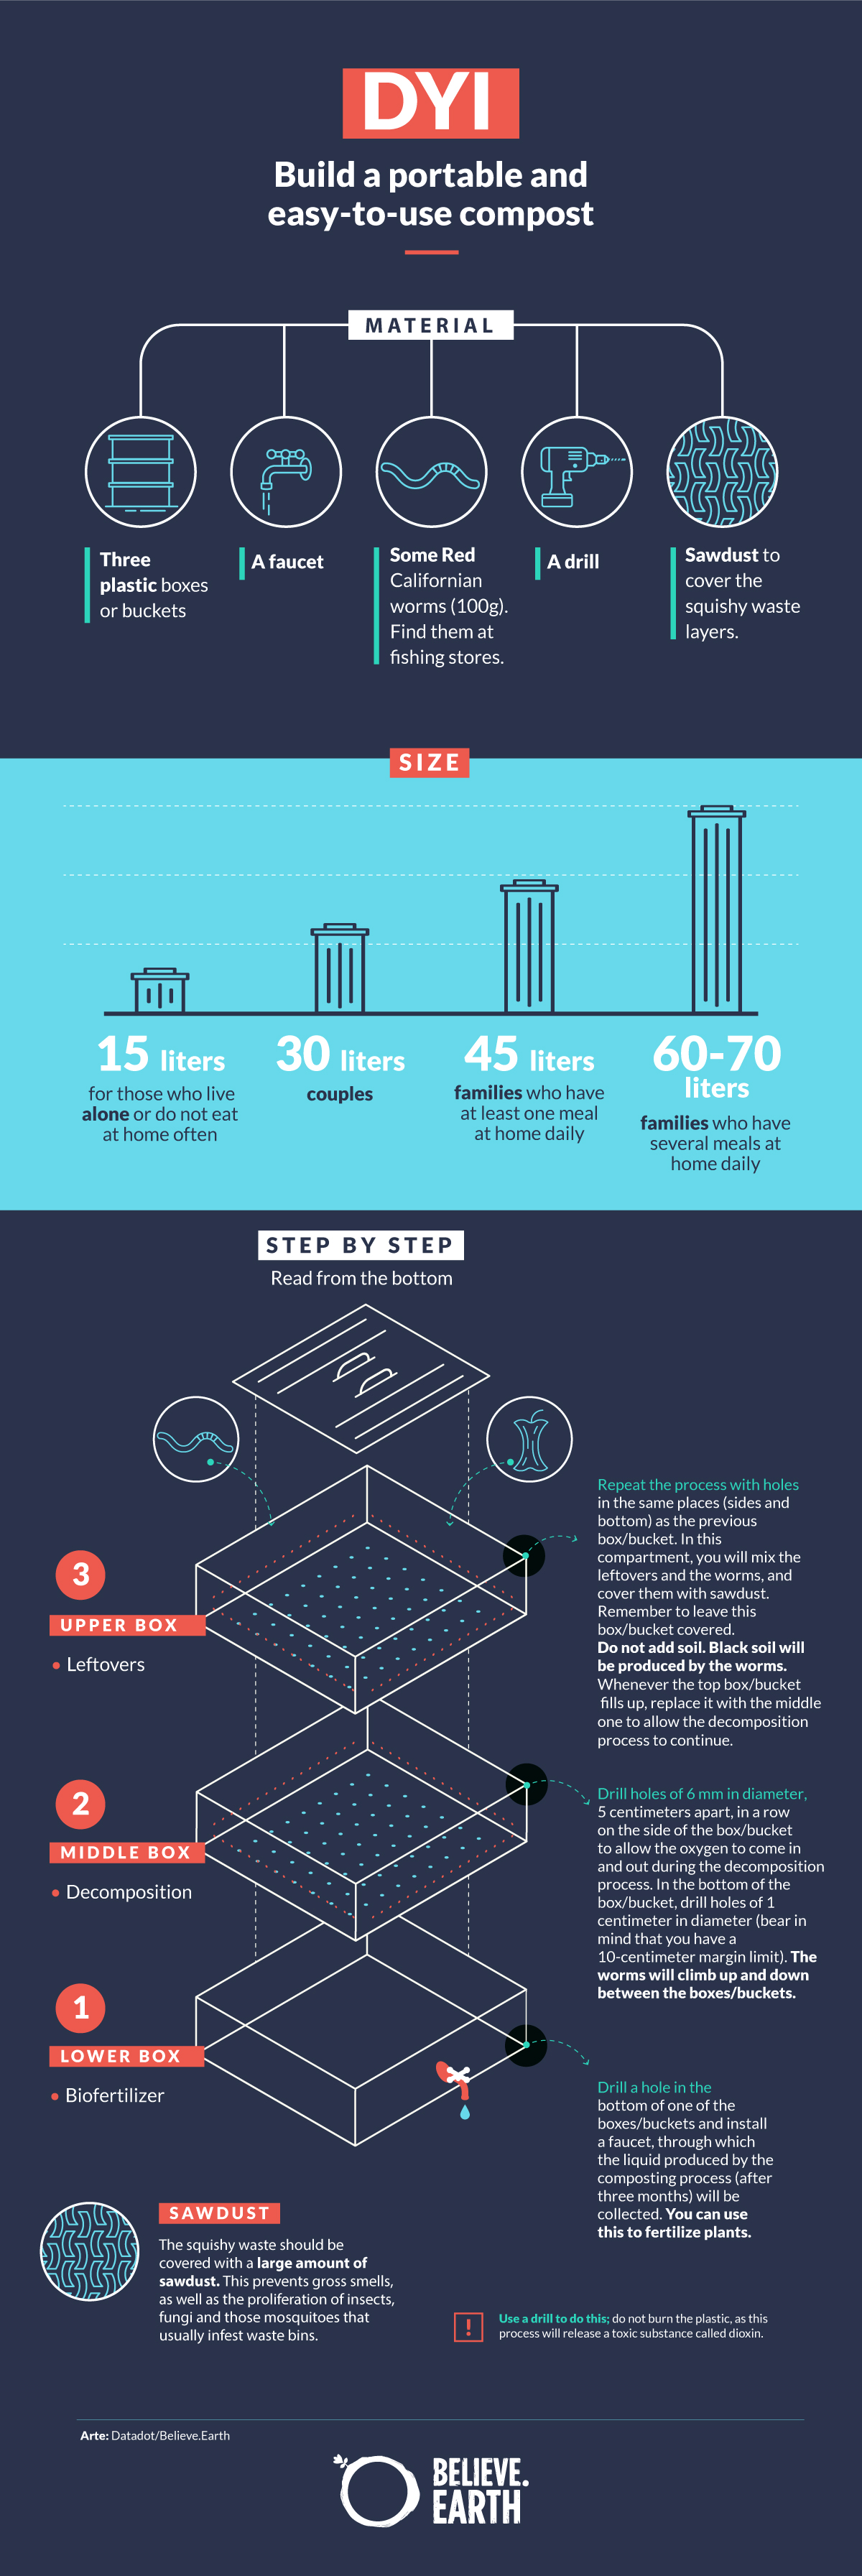
When you switch the top and middle boxes, you do not need to add new worms to the environment, as they will climb through the holes searching for food. As you fill the second box/bucket up (the new top), the other (the new middle) will be producing humus from the end of the leftover decomposition. As you fill up the top box/bucket, the humus will be getting ready in the bottom compartment. Now you can use it as fertilizer for the plants! Then, change the boxes and start the whole process again.
Your compost is ready. It’s time to check out these 7 tips to avoid mistakes.
1- Use Red Californian worms
A handful of worms is enough to start your composting. Red Californian worms are best as they eat 50 times their own weight daily. This speeds up the process and improves the quality of the fertilizer. You can get them at any fishing store or join one of many composting groups on social media, where worm donations are frequent.
Tip: The number of worms multiplies every six months. After this period, it’s time to put them into your garden or donate them, as overpopulation can throw the worm composting environment out of balance.
2- No sunlight or rain
The compost should always be kept in the shade or in a sheltered place; plastic gets hotter as long as it is exposed to the sunlight, and you don’t want rainwater running through the holes where the oxygen is supposed to come in.
3- Not everything
Compost eggshells, vegetables, fruits, stalks, tea, coffee grounds, but exclude citrus fruits, dog and cat poop, garlic, onions, meat, black walnuts, wheat, paper, spicy food, and sick plants, as they undermine the decomposition of the organic matter and attract animals to the compost.
4- Cut the peels
The composting process takes an average of three months. To speed it up, cut the peels into small pieces. If you are going to spend time away from home, leave bigger pieces to slow down the process so the worms will have enough to eat during your absence.
5- Pay attention to moisture
Excessive moisture is the main threat to your compost. It is caused by the lack of dry layers. When feeding the compost, imagine that you’re making a lasagna, and you need to interlay wet and dry layers to make it work. Pay special attention to the top layer, which must always have twice as much moisture as the rest. Following this process, you’ll avoid excessive moisture as well as the smells that often attract flies, cockroaches and even mice.
Tip: One sign of excessive moisture is fungi on the compost lid. If you see this, you must focus on expanding your dry layers. Another way to figure out if your compost is too damp is to squeeze the humus in your hand. If the liquid drips between your fingers, it means that there is plenty of water in your compost but not enough dry layers. The ideal is when you squeeze it and your hand moistens, but the humus sticks together in a loosely-packed ball.
6- Dry leaves or sawdust?
If you take some care, it really doesn’t matter. If you choose leaves, leave them in the sunlight for one or two days; this drying process will help keep fly eggs and blowfly maggots out of your compost. If you choose sawdust, it must be unvarnished, as the chemical used in varnish kills the worms.
7 – To avoid those nasty smells
Mix up the materials contained in the top box with a small spatula once a month to facilitate the flow of oxygen in and out. This prevents fermentation and its associated rotten smells. You do not need to sanitize the boxes/buckets. If you want to clean them, never use chemical products, just water and coconut soap.
- If you prefer to buy a ready-made compost bin, there are options on this site.
- This video also gives you nice tips on making your own compost.
- The University of Illinois, in the USA, has compiled this text with some relevant information on composting.
- If you are a beginner, these guidelines can help you to get started composting your organic waste.
- Here are the United States Environmental Protection Agency (EPA)’s guidelines for composting waste at home.
- This article by John Quinn is very useful to understand how to composte waste at home.